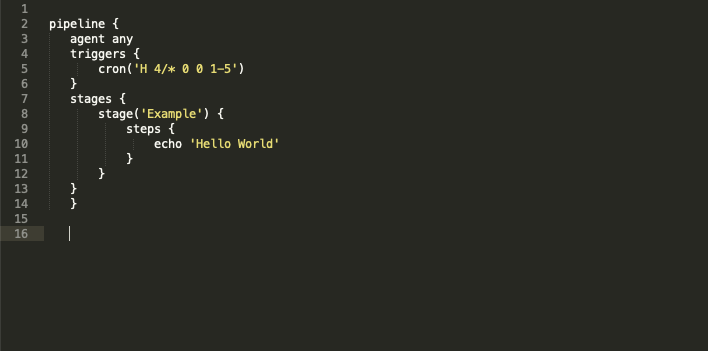
The open source CI/CD software Jenkins got a really cool integration of pipelines. If you are using the version 1.x you have to install a pipeline plugin, but it is highly recommended to use the newer version 2.x. In this version, you can also install the new UI called “blue ocean”. It’s a new way to display pipelines and the actions inside them, but let’s get back to topic. Jenkins scripted pipeline as engine for automation If you are using Jenkins pipelines (version 2.5+) within multibranch, the best way is via Jenkins file inside a git repository, you can’t edit the settings of the job. It is only possible to take a look at it, but you can’t save your changes. It’s possible to issue some lines inside the pipeline syntax to take control of these properties and settings. Therefore the is a special part of the syntax, only for properties in front of the job, but you have to take a deeper look on what type of pipeline you are using. Jenkins provides two types of pipelines. First one is the declarative pipeline and Jenkins.io describes it as follows: “Declarative Pipeline is a relatively recent addition to Jenkins Pipeline which presents a more simplified and opinionated syntax on top of the Pipeline sub-systems”. You can describe the agent, options, parameters or triggers. Everything is in the top part of the syntax, so you can be sure it’s loaded when your pipeline will start. The other side is the scripted pipeline as Jenkins.io described it like this: “Scripted Pipeline, like Declarative Pipeline, is built on top of the underlying Pipeline sub-system. Unlike Declarative, Scripted Pipeline is effectively a general purpose DSL built with Groovy. Most functionality provided by the Groovy language is made available to users of Scripted Pipeline, which means it can be a very expressive and flexible tool with which one can author continuous delivery pipelines”. By the way, DSL here means “Domain Specific Language” what is very good described here at wikipedia.org. Practically use of properties For a configurational reason, in my cases, we are using the scripted pipeline type. First thing, the documentation of it on the official site includes round about 30 lines. If we take a deeper look at declarative pipelines it’s 10 times bigger :-D. So what, we have to get a running syntax to use the properties on top of scripted pipelines because we want to use cronjobs triggered by Jenkins. Inside the documentation of the declarative pipeline, it is described this way Jenkinsfile (Declarative Pipeline) pipeline { agent any triggers { cron(‘H 4/* 0 0 1-5’) } stages { stage(‘Example’) { steps { echo ‘Hello World’ } } } } But this won’t work inside the scripted pipeline, believe me, I’ve tested it :-D. It is possible to change properties and options if we make something like this here. properties( [ pipelineTriggers([cron(‘0 2 * * 1-3′)]) ] ) Inside this properties part, we can add as much “settings” and “parameters” we want. It’s separated by a comma and for a better reading by line. So you can add for example params or options like the log rotator. properties( [ [ $class: ‘BuildDiscarderProperty’, strategy: [$class: ‘LogRotator’, numToKeepStr: ’10’] ], pipelineTriggers([cron(‘H/30 * * * *’)]) ] )
Decrypt easySCP DB password
Ihr kennt vielleicht den Moment, ihr werde angesprochen oder habt selbst das Problem, dass man sein “root” Passwort vom MySQL Server verliert und entwendet – Passiert natürlich nie ;), oder aber ihr migriert von einer anderen Version easySCP. Wie dem auch sei, wenn ihr nun das Passwort nicht mehr haben solltet und aber trotzdem haben möchtet, dann gibt es hier einen kleinen aber sehr effizienten Trick das verschlüsselte Passwort von easySCP wieder zu entschlüsseln. Dafür benötigt ihr eigentlich nur euren “Key” und eure “IV” welche in der “config_DB.php” stehen, sowie das base64 verschlüsselte Passwort welches man haben möchte. Diese drei Werte müssen danach in dieses Code-Snippet eingefügt werden. Die stellen habe ich euch markiert. function decrypt_db_password($db_pass) { if ($db_pass == ”) { return ”; } if (extension_loaded(‘mcrypt’)) { $text = @base64_decode($db_pass . “\\n”); $td = @mcrypt_module_open(MCRYPT_BLOWFISH, ”, MCRYPT_MODE_CBC, ”); $key = “<strong>KEY</strong>”; $iv = “<strong>IV</strong>”; // Initialize encryption @mcrypt_generic_init($td, $key, $iv); // Decrypt encrypted string $decrypted = @mdecrypt_generic($td, $text); @mcrypt_module_close($td); // Show string return trim($decrypted); } else { throw new EasySCP_Exception( “Error: PHP extension ‘mcrypt’ not loaded!” ); } } echo decrypt_db_password(‘<strong>base64 PW</strong>’); Diese Datei muss (über den Browser erreichbar) für die Zeit der Abfrage in den Webroot gelegt werden. Ausführen im Browser und schon hat man das Passwort in Klartext vor sich. Die Datei sollte danach wieder gelöscht werden, da nun auch andere über die Datei das Passwort auslesen können. Was hier gemacht wird ist eigentlich relativ simpel, in der Funktion wird auf die selben Entschlüsselungsalgorythmen zugegriffen, welche auch easySCP nutzt. Hier sind es base64_decode sowie Teile von mcrypt, einer php basierten Verschlüsselung.


